Wednesday, December 30, 2009

Where did all these apples come from?


Do you ever do this? You go to the store and think hmmm, those look good and we don't have any of those I think I will get some. Then you go to the store again and think to yourself, hmmm, these are on sale and we haven't had any in a while, I think I shall surprise my family with a few. Then again, you head to the market and say to yourself, wow, what a deal, those are some nice looking whatjamajiggies, I must grab as many as I can stuff in a bag and bring them home to my loved ones so they will know that I truly heart them. Well in my case and in this instance it was apples. How I ended up with two refrigerators a total of 4 produce drawers full of apples is a mystery but wait! There were more! I found a bag of apples still sitting by the front door where one of the offspring sat it after bringing it in from the car. Crazy right? Not as crazy as finding ANOTHER bag of apples hiding in plain sight on the kitchen counter. I don't even know how many pounds of apples I found. How many pounds of apples do you think you could fit in fright car? I think that's about how many I had. There were fujis, braeburns, gala, cameo, golden delicious, red delicious, granny smiths and some jonagolds. Some were firm, some were not. Some were pretty, some were not. The only thing that all the apples had in common is that none of them were getting any fresher! I hate to waste anything so I had to get busy and fast.


First things first.  Gather all the apples and give them a good bath.  I used basic H and vinegar to wash them before doing anything else.  Next I got out my handy dandy peeler/slicer/corer and used it to peel all these bad boys.  I prefer to core my apples by hand because the gadget doesn't always get all the core and I hate little scratch bits of core in my appley treats.

If the apple is too soft or mealy it doesn't not peel well with the gadget so those went into a separate bowl.  Mealy apples, as long as they aren't rotten dehydrate just fine.  Firm apples went on to be cored, sliced and put in a large stock pot with some mulling spices, apple juice and agave.  The apples destined for the Excalibur were cored and sliced and dipped in water with lemon juice in it.  One the tray and into the dehydrators they went.  I can hear them drying as I type.

I used 1/2 gallon of unsweetened apple juice and 1 cup of agave.  I didn't want the apples super sweet.  I wasn't going to use any sweetener but I had lots of granny smiths and they were super tart.  My plan for these apples was just to have some canned apples that I could later use for cobblers, pork chops, as a topping for oat meal or a glaze for chicken or ham.  I could always add sweetener and thickeners when I used them.

I was going to put the apples in pint jars raw and pour boiling juice over them but my canning books all said to boil the apples for 5 minutes first.  This really broke the apples down.  Out of all that fruit I only got about 7 or 8 pints.  Correction, I got 12 pints of apples and 5 half pints of pears.  Not too bad after all! I also filled two dehydrators with apples.  I can't say if it was worth all the work or not. After a good nights sleep I think it was worth the work.  I haven't tried the canned apples yet and no one is opening any jars until my feet have stopped hurting from a day of standing over the sink cutting up apples.

My next canning adventure:
Canning turkey broth

Bread and Butter Jalapenos

The last of my summer garden is now in jars labeled Bread and Butter Jalapenos 12/09. Our pepper garden is the only thing that grew really well this year. In fact it grew and grew and grew. I started dreading walking past it because I knew I would see more peppers that needed attention. Finally with the cold weather the peppers have packed up for the winter and I have little break. That is after canning 18 half pints of bread and butter jalapenos! The last of the peppers. My eyes were watering, my hands were burning (and I double gloved!), my clothing smelled like onion and garlic steam, my dish towels were stained from turmeric and there were sticky spots on the floor from goodness knows what! The job is done and I am glad.


My recipe which is a bit of this recipe and bit of that recipe with a twist.

6 lbs jalapeno peppers
4 large sweet onions, sliced
14 garlic cloves sliced thin
1/4 cup pickling salt
10-12 cups of ice cubes
5 cups vinegar
4 cups sugar
2 Tbs mustard seed
2 tsp turmeric
1 tsp celery seed
1/4 tsp ground cloves


Toss the peppers, onions and garlic with the salt in a large enamel pot then toss the ice cubes on top and let set for 3 hours (oops, mine sat overnight!).  Drain the veggie mixture.  Mix sugar, vinegar and spices in a large non-reactive pot until sugar is dissolved.  Add the pepper mixture and boil for 4 minutes.  Ladle into prepared jars and process in boiling water bath for 10 minutes.  This made 18 half pints (8oz jars). 

I think these will be a great addition to deviled eggs, chicken salad, potato salad, hot dogs, and just about anything else you can think of!

Hot Cocoa

This is one of the quick and easy gifts I gave this year. Everytime the bottled milk went on sale I bought some and saved the bottles. Most of the time it was organic milk and I got the milk free when I bought fruit or cereal. Cool deal if you ask me. I love the look of milk bottles. I have a few old milk bottles I found at yard sales but even the new ones tickle me. So old fashioned looking. This year I made up a HUGE batch of our fave hot cocoa mix. There are oodles of mixes online. Just do a google. I was able to scoop in enough mix for 10 servings in each bottle. I printed up the easy directions and added a cool cow image I found online. I used some jute and scrapbooking paper scraps to decorate the bottle. Making the big batch of cocoa mix took about 20 minutes but will probably make 5 or more bottles. The label and decorating of the bottle took about 5 minutes. So in under an hour I can have 5 or more handmade gifts.


Here are a few more cute ideas using milk bottles.

(country living magazine)


I think it would be cute to make up a batch of milk bath or bath salts and put that in a cute bottle.  Tie on a pretty hand knitted wash cloth or one of those natural loofah sponges a long with some ribbon or raffia.  Just google milk bath recipe.

Wednesday, December 23, 2009

To-Do


(on the left a list of things under my bed, on the right my to-do list)

I am totally a list person.  I love making lists.  I love checking things off even more.  To other list makers my lists would probably make them batty!  To non-list makers they would probably run screaming.  I don't know how my brain works when it makes lists, it just does.  No rhyme or reason.  No certain order.  I see my lists not so much as a DO THIS IN THIS ORDER!!!!  My list is more like a list of possibilities.  Ideas should I find myself idea-less.  So what does my current list contain?

  • Bathe dogs
  • shampoo couches
  • clean chicken coop
  • butcher chickens
  • make curtains for school room
  • organize pantry
  • sew hot pads
  • make dish towel dresses
  • school plan
  • pay bills (yuck!)
  • Get coop ready for broilers
  • move broilers to outdoor coop
  • pull weeds
  • plant potatoes
  • make shepherd costume for Christmas Eve play (notice this way at bottom and it's due tomorrow!)
  • Mop floors
  • paint end table
  • Mail Christmas goodies to Mom!
  • Clean back porch
  • Clean up backyard
  • Bread and butter jalapenos
So those are a few of the things floating around in my head.  Their position on the list has no significance.  Or maybe it does.  There could be some deep psychological root to my list but I think it is just how I work!

Sunday, December 20, 2009

Easy Stove-top Lasagna


1 package of Italian turkey sausage
2 jars of fave spaghetti sauce
1 TB Mrs. Dash Garlic Herb seasoning
1 cup of ricotta (I used fat free)
1/4 cup grated Parmesan
1 cup shredded mozzarella (part skim)
1 box of bow tie pasta (I use whole wheat)

Put water on to boil and cook pasta until it's almost done.
Brown turkey sausage in skillet. Drain and rinse off any additional fat. Add two jars of sauce. In a small bowl mix ricotta, Parmesan and Mrs. Dash. When pasta is done drain it and toss with sauce in skillet. Dollop the ricotta mixture over the top and sprinkle with the mozzarella. Cover and simmer on low or put oven safe skillet in a 350 degree oven for about 15 minutes or until cheese is melted and ricotta is heated through.

I add 2 TB of dehydrated carrot powder and 1 TB of dehydrated kale powder to the sauce and simmer while the pasta cooks. It doesn't change flavor and adds and extra punch of nutrition! The carrots make the sauce a little less acidic tasting and the kids seem to like that.
Posted by Picasa

Canned Coleslaw


Surprisingly tasty! This recipe came from one of the many canning lists I am on. I was leery but gave it a try. I had a few beautiful heads of organic, locally grown cabbage from the farmer's market. I used my bosch to shred the cabbage.

Home Canned Coleslaw

3 lb cabbage
2 large carrots
1 medium onion
1 finely chopped bell pepper
1 tsp pickling salt (I use Real Salt)
2 c white vinegar
1½ c granulated sugar (I used 1 cup)
2 tsp celery seed

Remove the core from the cabbage and shred the cabbage and carrots. Finely dice the onion. Mix the onions into the shredded cabbage and carrots. Mix in the pickling salt. Mix well, cover and let sit at room temperature for 45 minutes to an hour.  Drain the liquid. While the cabbage is sitting, mix the vinegar, sugar and celery seed in a sauce pan. Bring to a boil. Boil 1 minute. Cool slightly. Pack cabbage mixture tightly into your jars.  Ladle syrup over the cabbage.  Adjust two piece lids. Process 15 minutes in boiling water bath canner. To serve: Use as is or drain then stir in salad dressing of your choice or mayonnaise.

When I made it I put about 1/4 cup of syrup in the bottom of each jar then packed my slaw in and poured the remaining syrup over the cabbage.  Be sure to use a spatula to remove air bubbles and get the syrup to run down through cabbage.

3lb of cabbage was about 1 large head of cabbage.

Oh, one last thing!  When you drain the liquid off the cabbage don't just throw it out.  It is a sweet and tart vinegar and is great for tenderizing a roast.  I poured it over a pork roast that I cooked overnight in the oven on low.  It was very tender and flavorful!
Posted by Picasa

Saturday, December 19, 2009

Thrift Store Finds


I took a quick side trip to the Salvation Army while out and about yesterday.  I was tickled to find this super cool canning jar.  It is called Le Parfait and is made in France (imagine something not made in China!!).  It is a nice heavy jar and is quite large.  It is .75 liter which I think is just over a pint. Maybe 2 1/2 to 3 cups.  I looked online and found that 1) I got a great deal!  and 2) I want more of these jars!

I picked up Country Living Handmade Country: Old-Fashioned Crafts and Timeless Keepsakes, a nice big coffee table style book with pretty pictures.  I love these kinds of books but they are usually out of my budget.  This one was only $1.49!  I was so excited because I looked at some Country Living books at Half Price Books and the cheapest was $10.


I can't wait to go back when I have a little more pocket money.  I am on a quest for 100% wool sweaters any color, any condition.  I found some at a yard sale but The Man accidently threw them away!!!  They were in a trash bag in the car.  I plan to use them to make felted hot pads and coasters.

All I want for Christmas....


Bubba finally lost his 2 front teeth. He lost one and the other was hanging there for weeks! It finally fell out. I told him now he can ask for his two front teeth for Christmas. I remember the old song but I guess my kids have never heard it because Bubba in all seriousness told me, "That's not what I want, I can chew stuff with my side TEEF, I want a toy or something!"
Posted by Picasa

Close up of Walnut Babies


Posted by Picasa

Knitty Christmas


I love love love these knitted or crocheted wash cloths.  I use them in the kitchen all the time.  I am making them for gifts this year and giving them with a bar of my homemade soap.

They are easy to knit.  I use size 8 knitting needles.  Here's how to do it.

Waffle Knit Wash Cloth
Use 100% cotton yarn.  I like Sugar and Cream Yarn because it comes in so many pretty colors.

Directions:

Cast on 38 stitches.
Knit 3 rows for border.
Row 1: (right side): Knit.
Row 2: K 3, purl to last 3 stitches, k 3.
Row 3: K 3, (P 2, k 1) 10 times, p 2, k 3.
Row 4: K 3, (K 2, p 1) 10 times, k 5.
Repeat Row 1-4 approximately 12 times or until you reach the size you like.  Knit 4 rows for your border and bind off as usual.
Posted by Picasa

Walnut Shell Babies


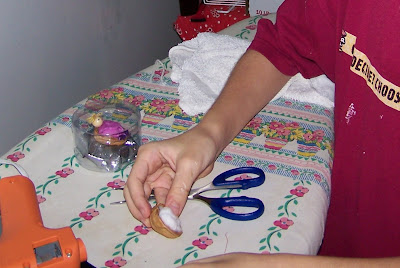
I love the idea of a homemade Christmas and with a much tighter budget this year we are making more than ever before. Pookie wanted to make gifts for her little friends so we did some googling and found these sweet little babies.  The hardest part of the whole project was cracking the walnuts perfectly without breaking the shells.  I found it was easier to pry them apart with a butter knife than to use a nutcracker.


A little scrap of fabric for the blanket wrapped around a cotton ball and hot glued into the walnut half made the babies body.  A small wooden bead and a little tuft of yarn for the hair and sharpie markers for the eyes and rosebud mouth.  A little bow glued on as a final tough makes this little baby a treasure for any little girl.  The package we put her in originally had cupcake liners in it.  I used a scrap of shimmery fabric to set the baby on.  This will go to Pookie's BFF for Christmas.


This little twin set was made using a cotton ball cut in half and wrapped in two different fabrics.  I used dried garbanzo beans for the baby heads.  I was out of beads and I thought the garbanzo beans looked kind of like poochie little newborn faces.  I added wooden discs and a toothpick painted black to make it look like a baby buggy.  I had lots of fun making them and I think the girls will have lots of fun playing with them.
Posted by Picasa

I feel fussy


I feel fussy.  I don't if it is the weather or the season or a combo of both but I am really struggling not to be ugly.

The weather has been bleak.  It's a good thing I don't live in Seattle where it rains 200 days a year!  It has been gray and damp.  Not a full on rainstorm with thunder and the sound of water splashing through rain gutters.  More like a giant unseen spray bottle set on mist for days on end.  Everything is moist and soggy.  Slick and muddy.  My dogs don't want to go outside to potty.  When we force them outside they run to what used to be our backyard but is now just a big mud puddle, do their business then run back in tracking doggy mud prints through the house.  The cat won't go potty outside in the wet either so we have moved her little box to the garage.  The dogs seem to think it is a snack dispenser because they go out and eat Kitty's poo then spend the night throwing up clumping cat litter poo.  Now that I think about it I guess I could see why I might feel a little fussy!  Did I mention that the cat poo gives my dogs bad bad gas?  And that the cat getting up on the counter eating the kids leftovers gives her bad gas?  So instead of the pine freshness of a Christmas Tree or cinnamon spice from the apple cider jelly I am making it smells like rotten eggs.

Ok, so I got it off my chest.  Now to play the happy game.  The constant mist has given everything much needed moisture.  It will be much easier to weed my sad garden and flower beds.  I can start getting my beds ready for early spring planting and can probably get some potatoes in the ground.  Ummm, that's about all I have right now!  If I could up with a happy reason for doggy gas and muddy foot prints I will be sure to share!

Wednesday, September 30, 2009

New School Year

We have started the 2009-2010 school year!  This is my 11th year homeschooling the kids.  It has really flown by.  I love it.  It is hard, tiring, trying at times, rewarding, fun, and sometimes tedious and boring!  I wouldn't trade it for anything.

Now that Bubba is in 2nd grade and a full blown school kid I am finding that teaching 4 different grades everyday is kind of time consuming!  This year I have a 10th, 7th, 5th and 2nd grader. 

TTO (the tall one), Nollie, Pookie and Bubba

To add all sorts of fun to our school day we adopted a kitten from a friend.  She is great incentive to finish work quickly.  Everyone wants to hold Kitty Diddle.  She is a sweet little thing. 
Isn't she pretty!

Tuesday, September 29, 2009

Polenta with Turkey Sausage and Greens


This dish came out very tasty. Even the kids liked it. I was worried that the green stuff and the texture would be met with curled noses and tears. This recipe came from a Weight Watcher's cookbook that I found at a yard sale for a quarter! It is called Everybody Loves Chicken. It is a great cookbook and way worth the quarter.

Polenta with Turkey Sausage and Greens
Serves 6
1 cup of coarse ground cornmeal
4 cups of water
1/2 tsp salt

6 spicy Italian turkey sausage (I used sweet Italian because of the kids)
14oz can of mustard greens (just greens and water!)

Bring water to a boil, slowly whisk in cornmeal. Keep whisking and simmering until it is as thick as you like and smooth. It will thicken more as it sets.

Squeeze sausage out of casing into a skillet sprayed with cooking spray. Crumble and brown sausage until cooked through. Add can of mustard greens (Liquid and all! The liquid has lots of vitamins.)stir over low heat until greens are cooked through.

If counting Weight Watcher points measure out 1/2 cup of polenta into a bowl. Top with approximately 1/6 of the sausage and greens mixture. Sprinkle with 1/2 TB of parmesan cheese. 6pts.

Tastes good the next day for lunch too! Just heat it all in the microwave and chow down.

Cornmeal and canned greens are great food storage items. I buy popcorn (not microwave popcorn, the real deal!) in 50lb bags at Sam's. I grind that in my grain mill for cornmeal. Grind as needed to retain vitamins and to keep it as fresh as possible. If you grind more than you will use then freeze the rest.

This looked very pretty in the bowl. Kind of Italian Country comfort food. Unfortunetly I was too hungry to go find my camera! Instead I am posting a picture of the canned greens I buy. They are cheap and simple. No additives.

This meal is a great budget stretcher too.
Greens .59
Sausage reduced for quick sale - $2.00 (at my grocery store they ALWAYS have quick sale turkey sausage)
Cornmeal:  Pennies for 1 cup of cornmeal.

Under $3 for the entire meal or aproximately .50 per serving.

Friday, August 14, 2009

Trials and Triumphs

Being on the verge of loosing everything is a humbling place to be! How do we do it? How do we keep from loosing hope and not give in to despair? Well, a lot of prayer and faith that God will do what He says He will do:

"Look at the birds of the air, that they do not sow, nor reap nor gather into barns, and yet your heavenly Father feeds them. Are you not worth much more than they?"
Matthew 6:26

We have been blessed by so many people that allowed God to use them and listened to God when He laid it on their hearts to bless us. It has been amazing to see the Body of Christ encircle us and love on us.

During this time God has shown us that we each have unique gifts and this has been an opportunity to exercise those gifts.

As each one has received a special gift, employ it in serving one another as good stewards of the manifold grace of God.
1 Peter 4:10

We have also learned a lot about prayer!

With all prayer and petition pray at all times in the Spirit, and with this in view, be on the alert with all perseverance and petition for all the saints,
Ephesians 6:18

I still have days where I feel downright picked on! I just want to stomp my feet and cry. I want to turn the air conditioner on without worrying about the bill, I want to buy my kids new shoes without having to plan months in advance and hope for a good deal at the Goodwill, I want a pedicure but then I remember that if I needed a pedicure God would provide and when the kids truly need shoes he will provide that too and even if we had a high paying job would I really want to crank up the air conditoner and have a $400 a month electric bill? Nah, not really and truthfully if I had $20 for a pedicure I think I would use it to bless someone else because you know what? We have been there and though $20 may not seem like much it might be exactly what someone else was praying for!

The LORD is my light and my salvation; Whom shall I fear? The LORD is the defense of my life; Whom shall I dread?
Psalm 27:1

'For I know the plans that I have for you,' declares the LORD, 'plans for welfare and not for calamity to give you a future and a hope.
Jeremiah 29:11

In you I trust, O my God. Do not let me be put to shame, nor let my enemies triumph over me.
Psalm 25:1

How do you make ends meet?


I never thought it could happen to us but here we are, 8 months and still unemployed. He was laid off Jan. 5th. The day he got back from Christmas vacation he was called into the office and they rang in the New Year by dissolving his department.

How do you do it? How are you making it? I get asked that a lot.

Are we making it? Yes we are! We haven't been kicked out of our house yet, we haven't had the utilities turned off yet, the phone gets turned off every other month or so but that isn't vital to our existence although sometimes it feels like it!

No matter how much we cut back we still need cash. We haven't figured out how to live without it! There are utilities, prescriptions, gas for the car that drives my man around looking for jobs, insurance, property tax, etc. So how do we do it?

Farm Girl's Amazon store and Ebay is one way. I have been going through the house and making hard choices about what we REALLY need and what is just fluff. We had a lot of fluff! I am also listing things for friends that don't really have the time or inclination to sit for hours editing photos, researching prices and creating listings. They provide the merchandise, I do the leg work and they pay me a portion of the profits.

Freshly baked bread sells well and is popular with friends and neighbors. I also make jelly, chutney and preserves. I can all summer in preparation for the November craft fair season. I take jellies, fresh baked breads, cookies, fudge, and fresh eggs. All of my items are priced under $5 so I sell a lot of them.

I sell eggs from our chickens too but after buying chicken food we pretty much break even. At least we get our eggs free and they also provide meat and nice compost!

I do a little sewing here and there and I have been asked to teach classes on canning and preserving, gardening, cooking from scratch and other homemaking skills.

We have yard sales every couple months. Anytime someone I know is getting rid of something I ask if they mind if I take it and if it is okay to put it in a yard sale. I would never sell something someone gave me without asking them first and offering them the money I receive from it. Most people just tell me to keep it. I appreciate having more 'stuff' at my yard sales because it draws more crowds. I don't mind selling for other people at my yard sales as long as they have a set price in mind so they aren't disappointed if I go too low.

I keep my eyes open for rare books when I go to yard sales, goodwill or half price books. I try to keep up to date on what books fetch a good price in home school circles and then keep my eyes peeled. I have purchased books for $1 or $2 at goodwill and turned around and sold them online for $40-$50. Doesn't happen often but when it does it's great!

I coupon when I shop but I only use coupons on items that are already on sale for a good price and I try to only use coupons on things we really need and use. A lot of coupons are for convenience foods or junk food. I cook from scratch and try to stay away from junk food. I don't mind making a cobbler or homemade cookies but that is a far cry from Twinkies or florescent colored sugary goo. I have been known to buy a box of pop tarts occasionally and some easy meal starter mix to have on hand for the kids or the man to make if I am not able to.

I used to subscribe to Grocery Game and it was great. I don't subscribe anymore because after several months I got the hang of it. It is more time consuming to do it myself instead of downloading their easy list but doing it myself saves me $20 every 12 weeks. They have a 4 week trial that costs $1 so I would say try it and learn all you can. Before you sign up for the 4 week trial collect as many coupons from the Sunday paper as you can so you have a good collection. When they provide a list with the weekly sale they tell you which coupon to use on that product and the coupon called for may be one from a few weeks before. So it helps to have several weeks worth of coupons BEFORE your 4 week clock starts ticking.

Those are just a few things I do. What do you do to make ends meet?

Check out YouTube for some thrifty videos.

Wednesday, August 12, 2009

DIY Powdered Laundry Detergent

This is a popular recipe found on several websites.

Powdered Laundry Detergent

2 cupsFels Naptha Soap
1 cup Washing Soda 
1 cup
Borax
* Mix well and store in an airtight plastic container.
* Use 2 tablespoons per full load.

I do not like the way Zote or Fels Naptha smell. I mean I really DO NOT like them. Both have a very strong perfume smell that really bothers my sinuses so I use my homemade soap. My soap is just a plain basic bar made with lard and coconut oil. No scent, nothing special. I have also used Kirk's Castile for Hard water with good results. I found it at my local grocery store years ago but haven't seen it in a while. I have read that you can use Ivory or Sunlight bar soap too. I haven't tried them.

I have a high efficiency front loading washer and this detergent works great because it doesn't suds up. I use more than two tablespoons in my wash though. I use closer to 1/4 cup but your results may very. A lot depends on the hardness of your water and the soap you use and how dirty your clothes are!

I get a box of Oxy-clean like stuff at the Dollar Tree and mix that in with my batch of detergent for a little extra oomph. I quadruple my recipe because I figure if I am going to make I might as well make it last! I use the cheese grater attachment for my food processor to grate the soap. It is easier to grate several bars at once and store in a container you can scoop from. I use the #10 cans with lids that you might buy coffee in. I have one for grated soap, one for borax and one for washing soda. Much easier than trying to pour the borax or washing soda out of the boxes. When I quadruple it I use one box of the oxy stuff. I think it is about 2 cups.

I splurge on a big bottle of fabric softener. I didn't used to use fabric softener back when we dried our clothes in the dryer but now that I hang them I do like using the softener. The clothes come our pretty stiff on the line but it is much nicer with a little softener added to rinse. I only use about a tablespoon so the softener lasts for a long time. I have tried using the vinegar rinse instead but for line drying it just comes out too stiff. I don't use softener on whites or towels, I use vinegar. I like my towels kinda stiff, it's like a loofah! I don't use it on the white because they tough the sensitive parts and I am always worried the softener might irritate those parts.

Cost wise I figured out that it cost me about .05 a load even when using the oxy stuff from the dollar store. The HUGE of fabric softener cost $13 and has lasted me 6 months so far and is still half full. I have no idea how many loads I do in 6 months but I would say the cost is pennies a load. I have been using the homemade stuff for over a year now and it works great. I feel that the clothes are clean, they don't seem to be dingy and they seem to be wearing well.

There are recipes for liquid laundry detergent and I used to make it but the powdered is so much easier and I can whip it up in no time at all.

Tuesday, August 11, 2009

This one's for the ladies!

Ok guys, you have been warned.

Reusable Cloth Menstrual Pads

I'm on this quest to figure out how to do it myself or do without. This one isn't a new one for me. I had a cloth diaper making business about 10 years ago and I made diapers, nursing pads and mama pads. I have used them myself for years. They are easy to make and can be made out of old t-shirts, old flannel shirts, sheets or towels. I would guess that every woman out there could make enough for herself and any other women in the house without having to buy a thing. Ok, you do need a sewing machine. I know they could be made by hand but a machine makes the job quicker and easier.

I will draw the line at posting pictures of my own personal collection here but here is a link with great instructions on how to make your own.

Make Your Own Pads

Here is another How To

Before you say NO WAY just think about it. Add up what you spend on feminine hygiene products and multiply that by how many cycles you have a year. Now multiply that by as many as 30 years! I'm just saying...

Another thought, suppose you become that 1 in 10 on food stamps or your household is counted as one of the unemployed. Imagine your monthly income being cut in half or more. Every penny counts in order to keep the lights on and the roof over your head. Where will you cut costs?

Monday, August 10, 2009

Cherry Berry Jelly


This is a new fave for the kids. After pitting 25lbs or so of cherries I just couldn't bare to throw away all the pits with little bits of cherry still clinging to them. That was a lot of work and it seemed a shame to not make more out of what was left. I simmered the pits for about an hour until most the flesh fell off and I had a pan of dark cherry-ish liquid. I strained out the pits (and still couldn't stand to throw them away!) and poured the liquid through a Norpro Jelly Strainer and Bag I added enough berry juice to make 6 cups then followed the directions on the pectin box for making jelly. It turned out super yummy!


Oh, and the pits were dried well in the dehydrator. I will use some of them for heating pads and let the boys use the rest as sling shot ammunition.

Sprouts: Gardening on Your Window Sill


Alfalfa Tea for the Garden

Alfalfa Tea - a definition

The information posted here on my blog was found at Dave's Garden. Dave's a great resource for all things garden and then some. Consider joining, it is a very good investment!


Dry alfalfa is a good slow-release source of nitrogen, but since you will be "digesting" it by letting it ferment in water, the resulting tea is a soluble, fast-acting nitrogen source.

Also, by making alfalfa (or manure) tea, you don't have to worry about weed seeds sprouting from the fertilizer.

In addition to nitrogen, alfalfa supplies enzymes and trace elements that are not present in chemical nitrogen fertilizers.


The Mix:
Choose a garbage bin or barrel with no leaks and a tight fitting lid. Position it in an out of the way place - you don't want to have to move it once it's full. For a full size garbage bin (20 gallons) add 16 cups of alfalfa pellets or alfalfa meal (4 cups to every 5 gallons or 22 litres of water)

Add 1 - 2 cups of Epsom salts (magnesium sulphate crystals) (or one quarter to half a cup to 5 gallons) Optionally, add two tablespoons of Iron Chelate
Fill with water, put on a tight lid to prevent mosquitos from breeding in your "swamp"
Let stand for one week until it bubbles with fermentation. Your nose will tell you that it's ready.

Using it:

Apply alfalfa tea once per month in the spring and summer, especially after the first flush of flowers, to encourage repeat blooming. You can reduce or eliminate the Epsom salts in later batches.

Stop applying it in the fall, when you want the plants to start hardening off for the winter, and don't want to encourage soft new growth.

Put on some old clothes - you're going to get splashed, and you don't want to be socializing with anyone while wearing the alfalfa tea!

Scoop off the liquid with a bucket and apply.

Pour a gallon of tea per rose around the base of the plant; more for large climbers, less for potted roses and minis.

Soak small potted roses in a bucket of tea for 15 minutes each.

When you have scooped off most of the liquid, you will be left with a thick goop of alfalfa in the garbage bin. There are two ways to treat this:

Method A: You can add another quarter-cup of epsom salts, fill the garbage can one third of the way up again, and stir the mix briskly so that the alfalfa is suspended in the water. This slurry can be applied to your roses immediately. Choose the roses in the back of your beds for this tea, where the greenish brown puddle of alfalfa slurry won't be too visible.

Method B: Add the full dose of Epsom salts, refill to the top with water and let sit for another week. Use the liquid, and then bury the alfalfa dregs into your compost pile (by this time they will be pretty smelly)

Another Recipe:

ALFALFA TEA

32 GALLON TRASH CAN
10 CUPS ALFALFA PELLETS (obtained from feed stores)
1 CUP EPSOM SALTS
1 CUP FISH EMULSION

Add the pellets to the trash can. Fill trash can with water. Stir. Cover trash can tightly with lid. For the next three days stir "tea" several times a day in order to dissolve the pellets. Keep covered. On the third day add epsom salts and fish emulsion. It is ready to use on any vegetable, plant, tree or bush.

When all the "tea" is used, there will be enough pellet residue in the bottom of the trash can that you again fill the trash can with water and make more "tea".

Check out comments for a list of all the good stuff in alfalfa tea.

Tuesday, August 4, 2009

Save those jars!

I have the jar adapter for my foodsaver so I can use mason jars but I am finding that I would rather save the mason/canning jars for actually canning. Those jars add up and are more precious than gold around here! Save your canning jars for canning and use the jars from store bought foods for vacuum sealing.

The sound starts off a little wonky on this video so turn it down if you are using headphones.

Friday, July 31, 2009

Supper with the Girls


Meet the Girls!
I can't really tell who is who from this angle but
the kids would probably know. I stopped naming them
in case we eat them. I'm more likely to name them as I
butcher them. Fryer, roaster, casserole, broth...
For the time being, they are all named Layer until they
prove otherwise!
Posted by Picasa

Thursday, July 30, 2009

If you can't stand the heat....


Yes, I really did take a picture of my thermostat! It's too hot to much else. The kids stand in the other room and blow me hugs because we don't want any heat sources that close to our bodies! My bubba doesn't want me to hug OR kiss him because he said I feel like hot and sticky stuff. Well, I nevah!

I am trying to keep the electric bill at least lower than the national deficit. We keep it off during the day and use it at night so we can sleep better. I just couldn't do it today. I set it to 80 and I still heard it come on several times and the coolest it got in the house was 83.


I know this is South Texas and all but it just seems hotter than usual. Every spring and fall I sing songs about the joy of living in Texas and write poetry about the perfectly beautiful days. Every summer I ask WHY!?!? This summer still seems worse than past summers. Maybe it is because we have only had 3" of rain so far this year. Last year we had so much rain that my chickens thought they were ducks and started quacking! They spent so much time in puddles I feared their feet would become webbed!

This summer has been dry. Everyone keeps saying it isn't as humid this year, and that sounds like a good thing but I think it isn't. Humid means moisture, moisture comes from rain, rain makes things green. Our grass isn't green, it is a nice straw color. I have always said that I wanted to get rid of the grass to make way for a bigger garden but in this heat and drought my garden is barely hanging on.

This really used to be grass. Very green tall grass that my happy hens loved to feast on. Now they dig holes and roll in the dirt. They always make the best of an awful situation! If life gives you dirt, take a dirt bath!

In the spirit of full disclosure (I would hate to be called dramatic or an exaggerator) I will admit that there still are a few small patches of green in my yard. Little oases of life that I feel guilty mowing when most everything else is dying.
This isn't just an excuse to show off my 'mid century' vintage thermostat! I wanted a good reason to show once again how clever I am. I'm not bragging, my mom tells me I am clever all the time. If I'm going to sweat my hiney off trying to save money by not using the AC during the day then why in the world would I add more heat to the house by using the stove or oven? I usually cook 3 times a day that can make the house unbearable. So here is where the clever comes in...


First I tried baking my bread in my big nesco roaster out on the back porch. The pans fit in just right. I set them on metal racks so the bottoms wouldn't burn. Everything came out great.

With the bread made we were able to have sandwiches for lunch instead of having to cook something.


Lunch out of the way, only one meal left. I put the last of our garden potatoes in the nesco and set it baking at 400. I cut up some sausage, poured BBQ sauce over it and topped with our homegrown bell peppers (store bought onions) and set them beside the potatoes. I cooked it all until the spuds were done and the BBQ sauce was sizzling. Came out wonderful. I even made dessert in it. Cinnamon rolls made with the extra bread dough from the bread I made earlier. The desserts rarely survive long enough for me to photograph so I am guessing the gang liked it.

If You Can't Stand the Heat
Get out of the Kitchen!
and onto the back porch

Update: many asked how I do my bread, what kind of pans I use, how long it takes, etc. so here are answers to some of those questions:

I use Norpro 8 Inch Nonstick Bread Pan bread pans that measure 8"x4"x3" deep.
They can also be purchased at Urban Homemaker.

I use agave as my sweetener so when I bake my bread I use a lower temperature than you would if you used regular sugar. I bake my bread between 325 and 350 for 45 min. If using regular sugar the recipe calls for cooking it at 375. Some days it seems to cook quicker than others. It probably has to do with how much dough I put in each pan. My recipe actually fills 5 of the norpro pans but only 4 fit in the roaster. I put 4 loaves in for regular bread and the fifth dough ball gets turned into cinnamon bread which I also cook in the roaster after the first batch of bread is done.

I use a metal cooling rack on the bottom of my roaster to set my baking pans on. That keeps them from burning. I take the lid off to check if it is done otherwise I leave the lid on.

I have made cobbler, cinnamon rolls, casseroles, bacon and even toast in my roaster. I try and do all my cooking outside because I don't like to heat the house.

Related Posts with Thumbnails

Backwoods Home

Backwoods Home Magazine - practical ideas for self-reliant living

BBQ

BBQ
a glimpse of things to come