Monday, December 22, 2008

Canned Chicken


Canned chicken is a pantry staple in my kitchen. I can use it to make quick soup, salads, casseroles, stir-fry and tacos or spaghetti. I have found store bought canned chicken to be very dry and flavorless. By canning my own I can control the ingredients, seasonings and my stuff doesn't get recalled! I can the chickens I butcher and also chicken I buy at a good price from the market.

My canned chicken has chicken and my homemade broth. My broth is cooked overnight with chicken bones, carrots, celery, garlic, onion, parsley and any other veggie or herbs that I have on hand at the time. I strain it through a cheese cloth to get a nice clear broth.

The store bought stuff looks something like this: Cooked Chicken Meat, Mechanically Separated Chicken Meat, Cooked Chicken Skins, Chicken Stock, Water, Contains Less than 2% of: Salt, Modified Food Starch, Sodium Phosphates, Natural Flavoring.

The store bought stuff doesn't look THAT bad but I would like to know what is in natural flavoring and what does mechanically separated mean? Why food starch and are sodium phosphates good for me?

Tamales!


Tamales are a Christmas tradition down here in South Texas. You can buy them from the grocery store but they are not very good. Not once you have had homemade! People start placing their tamale orders as soon as there is a hint of cool weather coming. After years of looking for the perfect tamales I decided to try my hand at making them myself.

It isn't as hard has I thought it would be. It has become one of those family traditions that mark the approach of Christmas, family, cold fronts and good food!

I started asking around to find someone to teach me to make tamales but found that most people just didn't make them anymore. They ordered them or their grandmothers or aunts made them. Everyone said it was too much work. Too hard. So I did what I always do when I want to learn something, I googled it! I found this site and then used it as a guideline to come up with my own version. I am now making them for friends and family and have even received a few orders! This year I have made chicken, pork, beef, bean and I am trying a potato and bean (papas y frijoles) as a breakfast tamale.


Tamale making tips:
Keep a little bowl of water by your work space. If the masa is sticking where you don't want it to or isn't sticking where you want it to just dip your fingers or spreader in the water and pat the masa into place.


Keep a damp rag handy. You can use it to wipe your hands or wipe off your work surface if it starts to get a little messy.

Make your masa about the consistency of peanut butter. If it dries out add a little warm water or broth to it.

If your corn husk is really wide just tear part of it off. I save those scraps to line the bottom of the steamer and lay them over the top of the tamales before steaming.

MaSeCa brand masa is the brand of masa I prefer. I have tried a few others and the results were not as good. MaSeCa mixes up well and spreads nicer than the other brands.

The premade masa has an off smell and taste to me. I like being able to use the cooking broth from my meats and adjust the spices. If your masa doesn't taste good before it is a tamale it is probably not going to taste good after it is a tamale!

Don't let anyone tell you that you can't make tamales!

Bread Day

Once a week I make lots of bread. I started out making it just for our family and I would take an extra loaf to a friend now and then. Soon I had friends showing up on my doorstep on bread day asking if maybe I had an extra loaf to spare. Soon I had a small following of bread junkies that show up with money in hand hoping to snatch up any extra loaves I have. I enjoy baking and I like that people like my bread and a little extra money for the fun jar is kinda nice too!

I make a whole wheat bread and often add goodies to it depending on my mood. I have started trying to make a good sour sourdough and while I have the sour part down but my dough always turns into a big blob when I bake it. Tasty but not pretty!

I bought my bread pans from The Urban Homemaker. I love these pans.

Sunday, December 21, 2008

Bread Baking Day

I usually make bread on Mondays. I get four loaves out of the recipe I use. With the Bosch Universal it is super easy. I can make up to 6 loaves at once but I only have 4 bread pans!
Here are my loaves, ready for the oven. They are rising nicely. It only takes about 45 minutes from the time I measure my ingredients to the time I put them in the oven. I bake them for about 45 minutes. So in less than two hours we have fresh bread!


Finished bread! They smell wonderful. One loaf is devoured right out of the oven and one loaf usually is taken to a friend or neighbor. The other two will be used for lunches or with dinner.


Tuesday, December 16, 2008

DIY Instant Oatmeal


We love oatmeal and instant oatmeal is very convenient but it is also pricey and full of junk! Not to mention all the packaging that is wasted with those little packets (my kids would eat like 3 each morning). I started experimenting with making my own. I think it tastes much better and is certainly better for us.

I use old fashioned oats, powdered milk, powdered whey protein (keeps my blood sugar stable), brown sugar, and real salt for the basic oatmeal. I then add all sorts of nutritional extras. I have some kids that don't like chunks of dried fruit in theirs but they all like the flavor fruit adds so I throw dried fruit, nuts or seeds and some of the oats into the blender and blend into a fine powder. The last batch I made I used pumpkin seeds, dried raspberries and dried apples. I also add spices like cinnamon, nutmeg, allspice, pumpkin or apple pie spice. Whatever sounds good. I used to package serving sized portions into reusable zip bags but that was too time consuming and the kids would forget and throw my bags away. Now I just mix it well in a big rubber made container. I just make sure the brown sugar is completely mixed in.

Too serve just scoop the desired amount into a bowl and pour boiling water over it. Stir and let set a bit to thicken up.

I make a HUGE batch but it really only lasts about 2 weeks.

Instant Oatmeal
32 servings

8 cups old fashioned oats
4 cups of oats; powdered in blender
3 cups dry milk powder
2 cups of brown sugar
4 tsp. salt


Optional Extras: ground flax, nuts, seeds, whey protein, cinnamon, dried fruit, oat or wheat bran.

Mix well and store in an airtight container. Scoop desired amount into bowl and pour boiling water over it. **Stir and let set a minute to thicken. We just eyeball the water amount. After you make it a few times you get your oatmeal groove and know just how much to use.

** if you use 100% old fashioned oats it might need a minute in the microwave to thicken it up. Sometimes I use quick oats for the whole oats and old fashioned oats for the pulverized oats.

Monday, December 15, 2008

Easy Potato Chowder

I love coming up with easy, cheap, hearty meals for my family. Lately I have been able to buy 20lbs of potatoes for about $5. They are usually $5.49 for a 5lb bag at my local grocery store but the small health food store has had them on special. I have been experimenting with potatoes for breakfast, lunch and dinner!

I started with about 6 slices of bacon chopped and cooked in my dutch oven. I used one potato per person (6 potatoes). Peeled and chopped an tossed in with the sizzling bacon. I also chopped half a large onion and minced some garlic. Saute all of it until the potatoes start to brown and the onion starts to soften.

I like to add a boost of nutrition whenever I can. I have baggies of steamed, pureed and frozen fruits and veggies so that I can easily add it to any meal. In this recipe I added pureed sweet potato and some dehydrated celery. I also used on jar of chicken broth. I added all of that to the potatoes and onions and then covered and turned the heat to low and let it simmer until the potatoes were cooked.

After the potatoes were cooked through I slowly stirred in 2 cups of milk. The milk I used was mixed from powdered milk but fresh or canned milk works just as well.

After the milk has been added and heated you can mash it a little to get a thicker soup. We like a creamy soup with some potato chunks. At this point you can season it to taste. Salt, pepper, Mrs. Dash and whatever else sounds tasty.


After the soup is done serve it with a crusty piece of bread and sprinkle the soup with Parmesan or any good cheese. Our total cost for this soup which served 6 hungry people (two of them teenage boys!) cost less than $2 for the entire pot!

Mango Jalapeno Jelly!

I had a request for a mango jalapeno jelly and this is what I came up with. It is very pretty. A light amber color with festive confetti like bits of red and green peppers. It has a bit more heat than some of my other jalapeno blends. I am not sure why. Different batches of peppers seem to have different amounts of spice. This is a bit thicker than my regular jalapeno jelly. I think the mangoes definitely add more body to the jelly. It is really more like a jam. I really like the slightly tropical taste the mangoes add. It would be wonderful brushed on grilled shrimp or salmon. I plan to use it on pork loin this week.
I will be making this one again!
Posted by Picasa

More Canning Adventures!

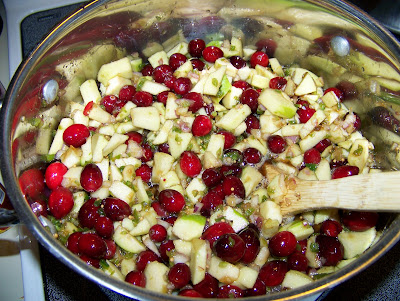
I have been wanting to try making chutney but none of the recipes I found were just what I wanted. I decided to take several recipes and tweak them to get what I was looking for. This is a Cranberry Apple Chutney. It has a little of this and a little of that and lots of apples and cranberries. It looked so pretty in the pan. Very festive! Chutney is a little more work than just your typical jelly. It requires a long cooking time because it does not use powdered pectin. I stirred and boiled and stirred and boiled for a couple hours it seems.

Posted by Picasa

This finished chutney doesn't look as bright and festive but it tastes wonderful! Sweet, tangy with just a little spice to it. My 5 taste testers gave it thumbs up. Even the pickiest tester that doesn't like 'stuff' in her food.
Related Posts with Thumbnails

Backwoods Home

Backwoods Home Magazine - practical ideas for self-reliant living

BBQ

BBQ
a glimpse of things to come